Recolor an Image in Photoshop with a Hue/Saturation Adjustment Layer

Are you afraid of trying to recolor digital scrapbooking embellishments because you aren’t sure which method to use, because you haven’t had success before, or because you fear you might alter your original image?
Photoshop and Photoshop Elements give us multiple tools with which to recolor images. The tool you use often will depend upon the image with which you are working.
Using a Hue/Saturation adjustment layer is a method by which you can easily recolor images that have good contrast. It’s a non-destructive technique, so you don’t need to worry about damaging your original image. (That said, however, it’s always a good practice to work on a duplicate image).
This is a very easy tutorial on how to recolor, using a Hue/Saturation Adjustment layer. Screenshots were created with Photoshop Elements 2021, but the instructions are the same in Adobe Photoshop.
Steps:
- Open an image with good color contrast. If you want to work along with me, you can download the Flowers 03 Trumpet Vine Sample Image.
- In the Layers Panel, click on the Create new fill or adjustment layer icon.

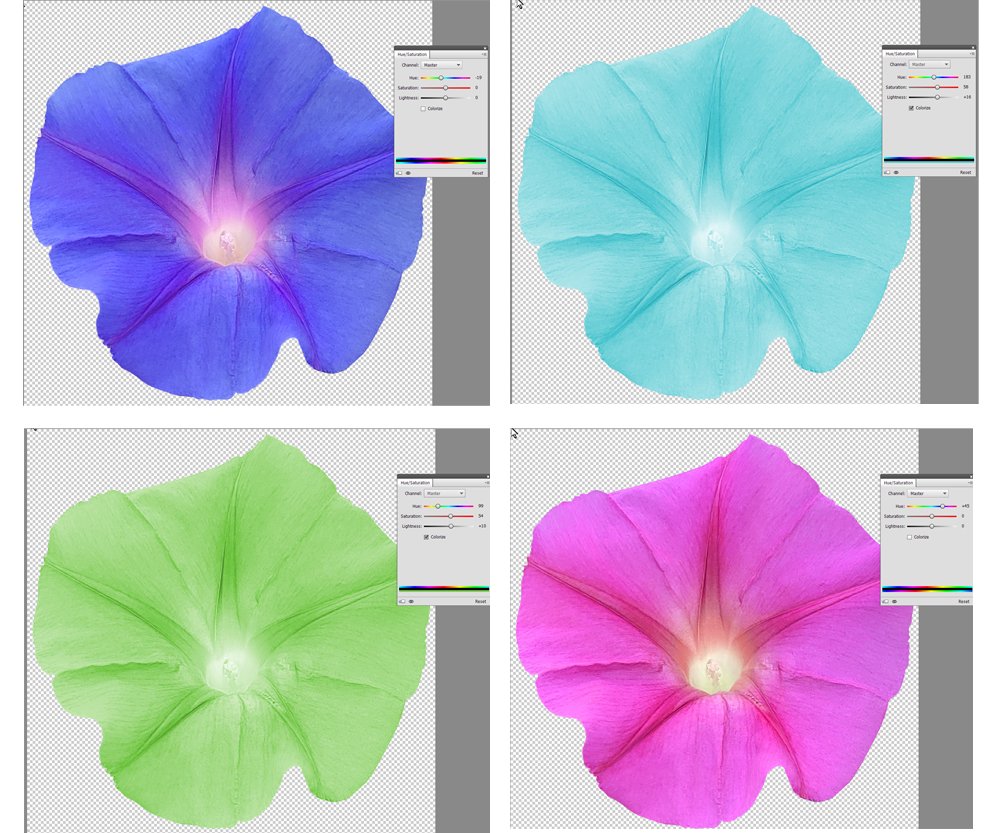
- In the Hue/Saturation dialogue box, leave the Channel set to Master. This will cause global adjustments of the hue, also referred to as the color. Drag the Hue slider to the right or left to change the Hue.
- You can adjust the Saturation and Lightness in the same way if desired.
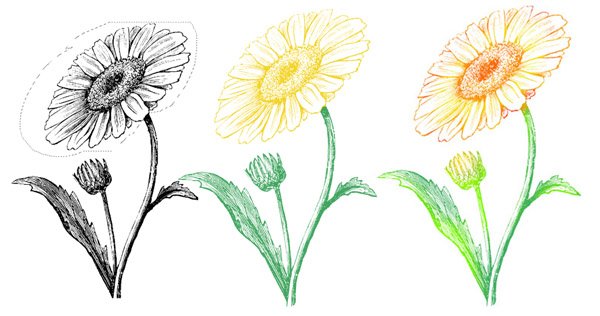
Bonus Tip: If you want to experiment, even more, change the Channel by clicking on the drop-down arrow in the Hue/Saturation dialogue box. Click on a color channel to select it, then move the Hue, Saturation, or Lightness sliders again. The selected Channel will only affect those colored pixels within that channel. It’s possible you might not see a change. For example, using our sample image, when I target the Greens channel and drag the slider, either way, I do not see a change in the image. That tells me there are no green pixels within this image.

Here are a few results that I achieved, along with their associated settings.


So the next time you find the perfect flower or another embellishment to use on your digital project, but it’s the wrong color, try a quick Hue/Saturation adjustment. This will help you get more use out of the products you already own, as well as help you see the possibilities with new products, knowing you can change their color easily if needed.
If you love the vibrant color and delicate texture of the Trumpet Vine flower, you will find my new pack of them at:
Karen Schulz Designs | Gingerscraps | Oscraps
If you would like to download a PDF of this tutorial you may do so here.


Comments (5)
You must be logged in to post a comment.
Thank you for the tutorial and free sample! This works! Yeah!
It does, indeed! 🙂
Yes! Thank you so much for this tutorial, and for the pdf of the tutorial, and for the sample!
🙂
You’re welcome, Anita!
[…] you need a brush-up on recoloring, my tutorial, Recolor an Image in Photoshop with a Hue/Saturation Adjustment Layer, should help, whether you use Adobe Photoshop or Photoshop […]