Vintage Sewing Machine Cabinet Repurpose

It’s no secret that besides designing digital scrapbook kits, I love to repurpose items, especially vintage pieces.
One of the things that I love about where we now live is that pieces I consider a “treasure,” are usually found in someone’s garage or barn, just waiting to be taken to the dump or to be rescued by someone. I was a “someone” who happily helped out “someone else” by purchasing this vintage sewing machine cabinet, sewing machine, and chair for their asking price of $10.

After getting these treasures home, I took a really good look at it all. The oak veneer is in really bad shape – dry, peeling and cracked. The iron is super rusty. So my thought was to take apart the cabinet and use the pieces as I can.
It was really interesting dismantling the cabinet. Boy, they sure don’t make furniture like they used to. It was a maze of hidden screws and dowels and interlocking joints. But I finally got it apart and then sat and looked at the pieces for a while.

I have a few ideas for the base and the drawers but set those aside to work on later. I set to work on the cabinet top right away.
First, I removed all of the veneer. There are several ways to do that, but my favorite (AKA easiest) way is to place a damp towel (that you don’t care about anymore) on the veneer, then press the towel with a super hot iron. This will melt the glue between the veneer and the wood underneath, making it easy to slip a metal scrapper underneath the veneer to lift and remove it.
I was excited to see what was under the veneer. I really liked the wood planks better than the oak veneer. I had to do some sanding next. Using an orbital sander, it didn’t take too long.
The fun part came next. I hauled the piece into my kitchen (uhh.. that’s because my craft room is being reorganized and I can hardly walk in there right now). As you can see, in the picture, I’m still working on the Highboy in my kitchen. It’s there in the background, on the left. 😉
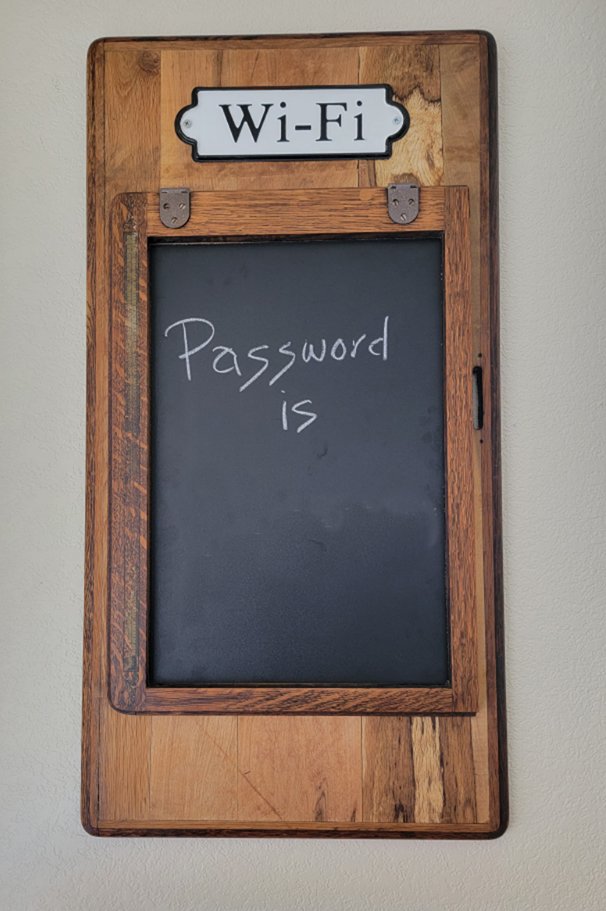
I screwed down a thin piece of wood to cover the opening where the sewing machine used to be, then stained that piece, along with the top of the cabinet, and glued the 2 pieces together.

The final touch was to get a chalkboard (which I happened to have in the garage. It hasn’t been used in a while but I was keeping because you just “never know!”…), cut it to fit, and drop it into the opening.
I hung this on the wall in our guest bedroom. So much easier to pass on the Wi-Fi password this way! And I might even add the temperature and weather conditions for the time period that a guest is with us too.


Now onto the rest of the pieces…. or maybe I should finish that Highboy first.
Comments (4)
You must be logged in to post a comment.


Ingenious Karen! I love seeing what you accomplish from all the “finds” you acquire and repurpose. At one time I could have pictured myself repurposing certain pieces that were given to me but at my age now I’m not certain I have the energy for it. LOL Who could have taken an old sewing machine cabinet and turning the top into a chalkboard? Only you!!😃 It is beautiful!
Ahh. thank you, Vicki, for your kind words. I’m glad to know that you like seeing my results. Thanks for letting me know.
Holy cow what an ingenious idea! I thoroughly impressed with the idea and results!
Gosh, thanks, Janet! 🙂