Improving Your Selfies
Are you a person who loves to take Selfies? One of the reasons I don’t take too many Selfies is that I can never seem to hold the camera still enough to get a decent shot.
I’ve seen Selfie phone cases, that have camera buttons on the back of the case, making it much easier to take a decent Selfie, and also the Selfie Sticks, that I assume might make it easier to get a good shot. But if you don’t have these devices, what do you do with slightly out-of-focus shot? Any slightly-out-of-focus shots for that matter, not just selfies?
If you are a Photoshop User there is good news for you. Take your shot and then use the Shake Reduction feature available in both Photoshop and Photoshop Elements.
In Photoshop: Go to the top Menu Bar then Filter > Sharpen > Shake Reduction.
In Photoshop Elements: Go to the top Menu Bar then Enhance and choose either Auto Shake Reduction (for automatic reduction) or Shake Reduction (for manual reduction adjustments).
This is a screenshot from Photoshop Elements 15:

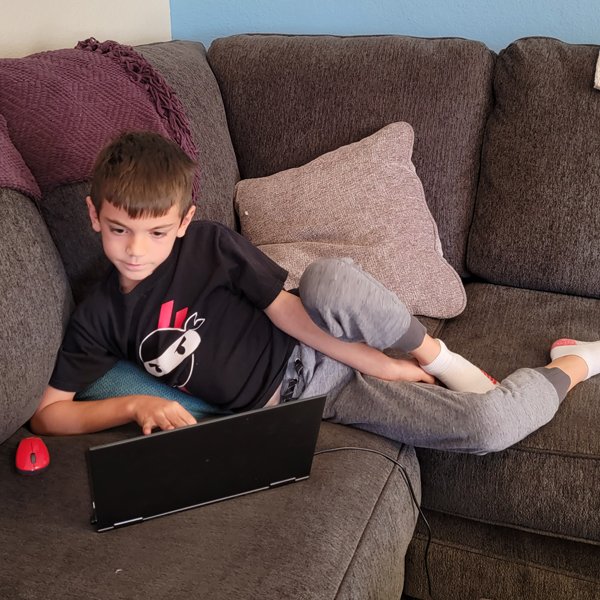
I don’t have many selfies to choose from, but I did find this photo of my grandson, Tyler, learning to walk. I thought it would be a good photo to experiment with.
 I opened the photo in Photoshop Elements 15 and applied the Auto Shake Reduction. It didn’t do a bad job. Tyler’s face and upper body are more in focus.
I decided to try the Manual Shake Reduction feature to see how it differed.
- Using the original photo, I chose the option Enhance > Shake Reduction
- A Shake Reduction Analysis rectangle is automatically placed on the photo. Photoshop uses this to analyze the photo and add shake reduction to the entire image.
- You may use your mouse to enlarge or move the rectangle. I moved it to Tyler’s feet. You may also draw additional rectangles if you wish.
- The Sensitivity slider adjusts the amount of Shake Reduction intensity.
- The Before / After button toggles between your images.
The final image using the Manual feature isn’t a lot different from the Auto Feature, on this image anyway, and with the amount of sensitivity I applied.
This tool is meant to assist with slight blurriness and isn’t a fix-all for photos that are very blurry. But it’s a nice tool to have in our photo-editing arsenal.
I hope you will find this helpful the next time you have a slightly blurry image you would like to edit.

Comments (2)
You must be logged in to post a comment.
Thanks Karen–I am S OOOOOO NOT into selfies, but this sure makes working with the ones I see a lot easier.