How to Color Black Brushes and Stamps in Photoshop, Part 2

“A digital stamp in crafting, stamping, card making, and scrapbooking is a digital image which can be manipulated in Photoshop.” (-Wikipedia). Digital stamps typically come in .abr (brush) and PNG formats; and are usually black in color.
An often-asked question is how to change the color of a black stamp to a color of choice. I covered a basic technique in How to Color Black Brushes and Stamps in Photoshop, Part 1.
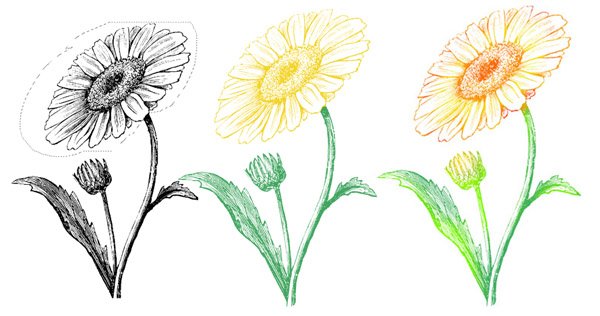
In Part 2 of this series, we will learn how to add multiple colors to black stamps.
I am using Photoshop CC 2019 for tutorial images. The instructions for this tutorial, however, will be the same for either Photoshop or Photoshop Elements.
Basic Multi-Coloring:
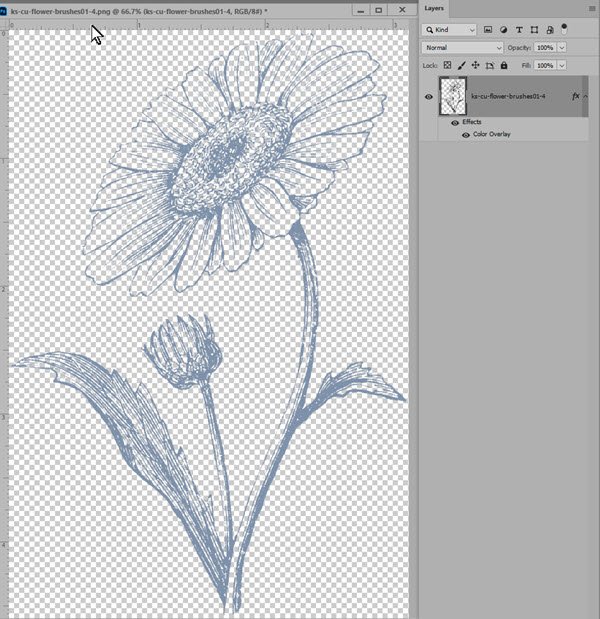
- Place your stamp on a blank layer above your background. I am using an image from Flower Brushes 01.
- Simplify (PSE) / Rasterize (Photoshop) your image if it is a Smart Object.
- Click on the Lock Transparency Icon at the top of the Layers Panel.
- Select the Lasso Tool in the Tool Bar on the left. Draw around the large flower; the goal is to separate it from the rest of the image.
- Once you have closed the selection, go to the top Menu Bar: Edit > Fill. (Set the Contents: to Color, if it is not already selected.) When the Color Picker opens, select the color that you want your flower to be. Click OK.bb
- With the flower still selected, go to the top Menu bar: Select > Inverse. Now the rest of the stamp is selected.
- Go to the top Menu Bar again: Edit > Fill. In the Contents Box, choose Color in the Dropdown Menu to open the Color Picker. Select the main color for the body of the flower stem and leaves. Click OK.
- Press Ctrl + D (Cmd + D) to deselect.
- Now it’s time to add additional colors to your flower. Because you have locked the transparency of the Stamp layer, you can paint (brush with any color) over the flower and not interfere with your transparent background.
- Choose a soft-edged round brush, about 50 px in size. Adjust the size as you prefer.
- Make your color selections and add color as you like to the stamp. I chose a lighter green to highlight areas on the stem, an orange to add additional color to the flower, and a red to add a little more color variation. What colors you choose to use and where you decide to color is up to you.

If you don’t have any stamps to incorporate into your digital scrapbook pages or projects, you might just find something in my Stamps category that suits your needs.
Stamps can add so much interest to a digital layout. They’re fun to use when creating your own greeting cards too!

Is this coloring technique new to you? Locking the transparency on a layer is THE key to designing your own fun, colorful images from stamps. So don’t wait any longer! Grab a stamp and start coloring!
Comments (11)
You must be logged in to post a comment.


Love your tutorials & thanks so much for doing them.
You’re welcome, Zanne! I’m glad you find them helpful!
Thanks Karen! I learn something new in every one of your tutorials. This time is was about Lock Transparency- thanks again!
Thanks, Renee. Lock Transparency is like magic!
hi – could you make Part 1 available as a pdf??? Thanks much
Oh my! Will I ever learn it all? Thank you so much for this.
Your tutorials are great. Thank you so much for taking the time to care your knowledge.
I love your tutorials. You always seem to pick what I most want to learn! Thank you so much!
Love your tutorial Karen and the results, always so much to learn from you.
Thank you, Faith! I’m so glad!
[…] to Color Black Brushes and Stamps in Photoshop, Part 1, Part 2, Part […]