Create Unique Backgrounds with Clipping Masks


Clipping masks are extremely versatile and one of the best tools in Photoshop. The use of a clipping mask is a perfect way to take a good design and make it better.
While clipping masks may look difficult to use at first glance, they are really quite easy to apply, and the creative options when using them are endless.
This tutorial will focus on 3 ways use to create unique backgrounds using Brayered Masks. If you are new to clipping masks or need instruction or a refresher on their use, my previous tutorials, “How to Use Clipping Masks in Photoshop and Photoshop Elements” and “How to Use Photo Clipping Masks” will get you started using this fun technique.
Brayered Masks 01 were created large in size to allow for versatility. They can be used as-is, resized, flipped, rotated, or even reshaped, according to your needs.
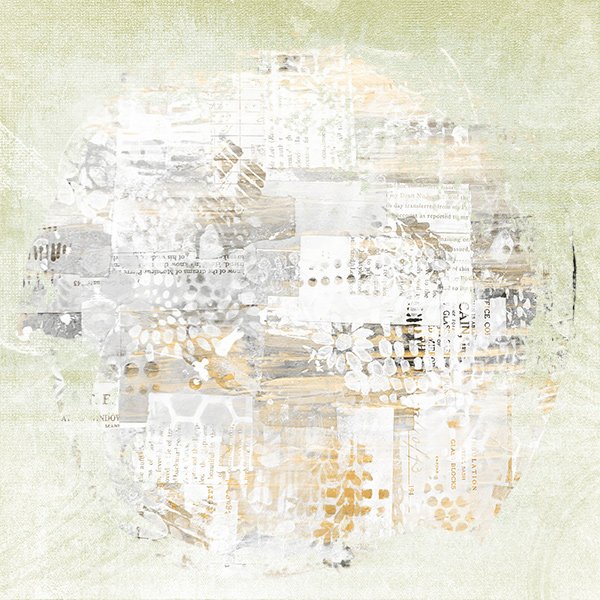
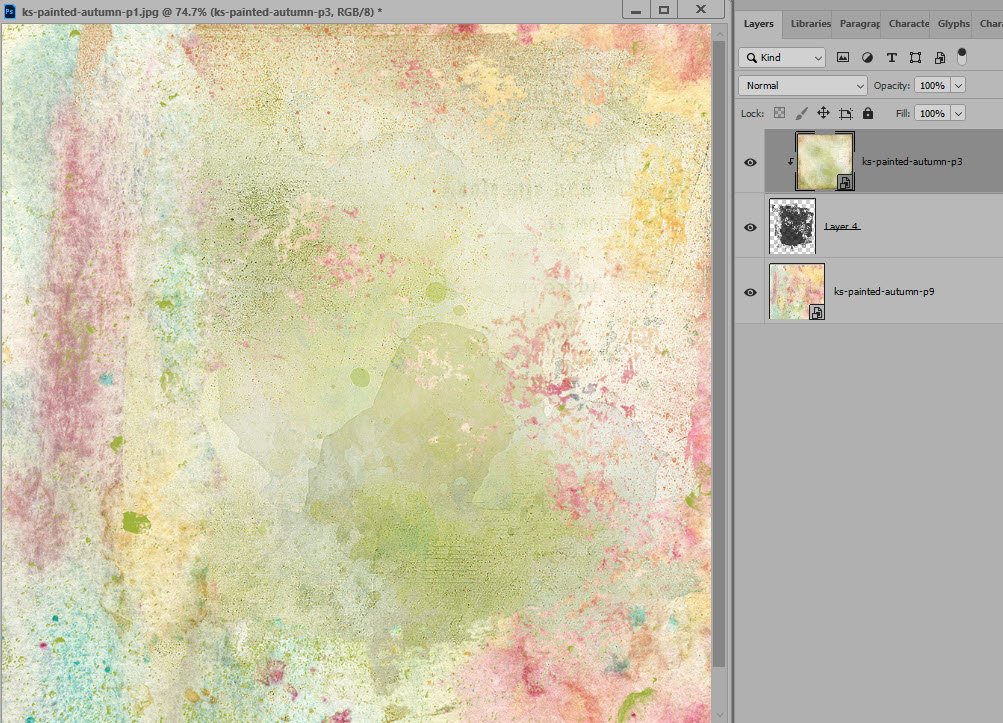
Example 1: Use One Mask to Add a Specific Color to Your Paper
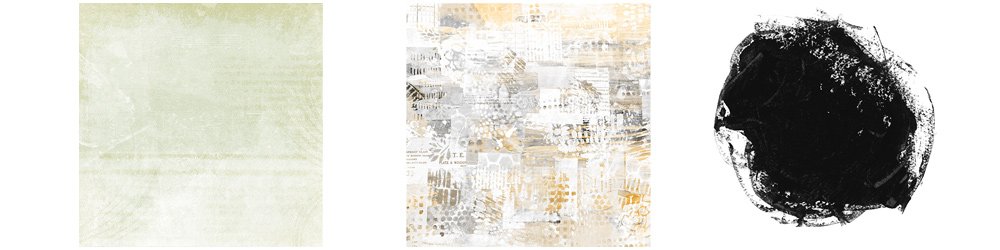
Let’s start with using 2 Papers (from Painted Autumn) and 1 Brayered Mask (#8),
The multi-colored paper is really pretty, but if you wanted the paper to have more green, specifically in the middle of the page. It could be difficult to achieve that result with any re-coloring technique you might use. Using a Mask makes it a quick and easy task. By clipping the green paper to a mask, we can quickly add that color and in the process create a unique paper that will coordinate beautifully with either of these single papers and/or other papers within the kit from which the papers came.

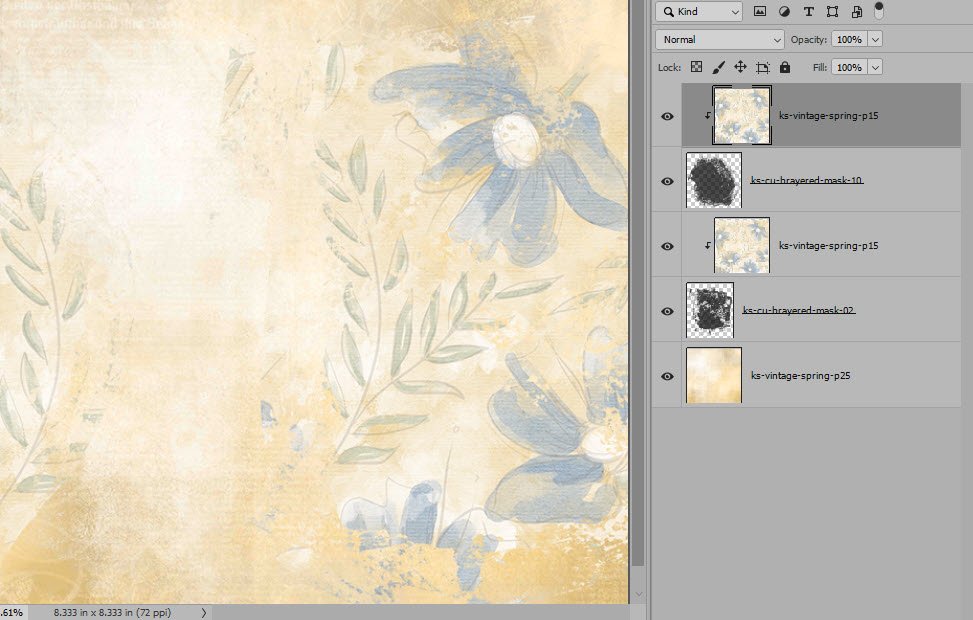
Example 2: Use Multiple Masks to Create a Unique Design
Don’t restrict yourself to just one Mask. Try creating a background using several masks. Using the Vintage Spring yellow blended paper as the base layer and by clipping the floral paper to 2 different masks, again, we create a beautiful paper that will coordinate with other kit papers

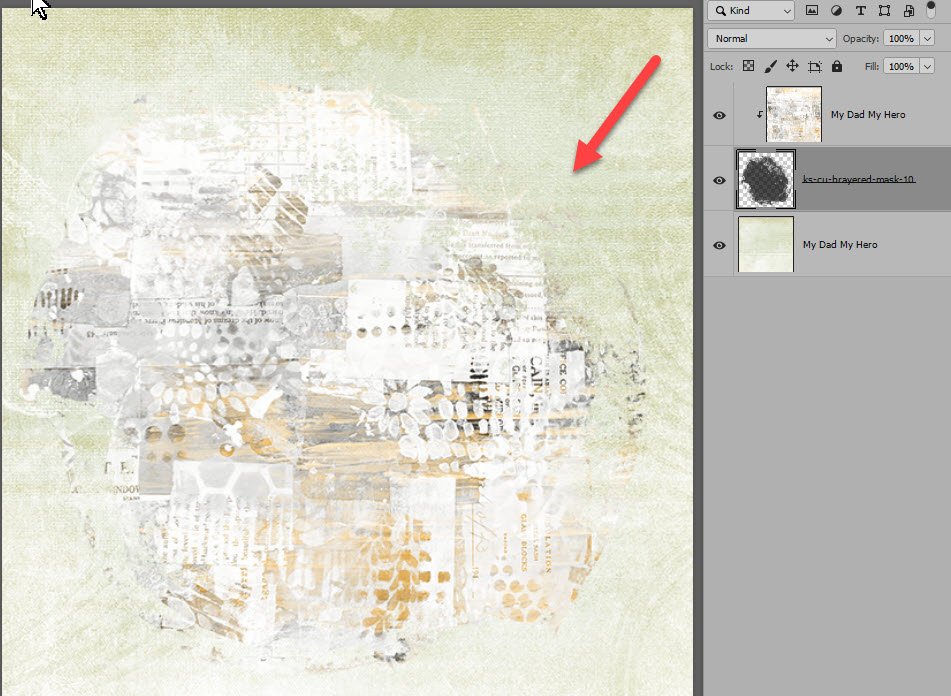
Example 3: Tweak a Mask to Make it Suitable for Your Page
Let’s use 2 papers (My Dad, My Hero) and 1 Brayered Mask.
By clipping the mixed-media paper to the green blended background, the result is a lovely paper, but it’s a bit off balance.
To fix this you could add another clipping mask, or tweak the one you are already using. I’m going to tweak the one I am using.
To tweak the mask:
- In the Layers Panel, turn off the visibility of the Patterned Paper so you can see the Mask Layer on the document.
- With the Mask Layer active, Ctrl T (Cmd T on a Mac) bring up the Transform Tools Options. Choose your favorite transform tool, and tweak the mask to your liking. I chose the Warp tool and dragged the mask to the upper right corner to create a more balanced look. (Although Photoshop has had the Warp tool for a long time, the Warp Tool has been recently introduced to PSE users in Version 2023).
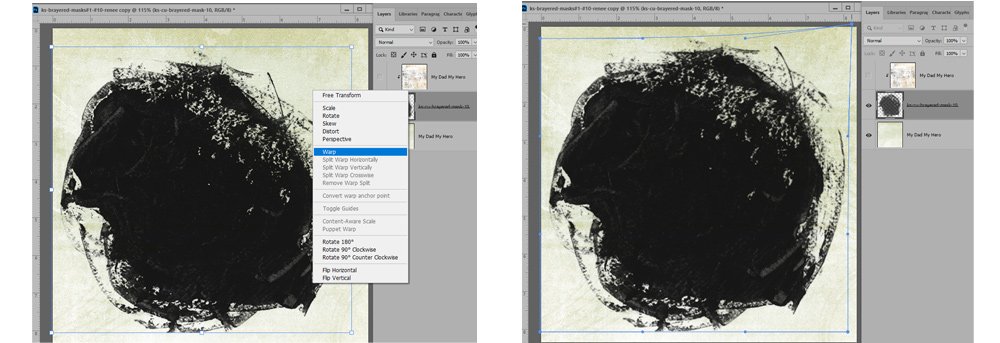
That’s better.
Additional Tips:
You can resize, rotate, flip, transform, color, and even use Blend Modes on Brayered Masks to create your own papers. Don’t forget you can also clip photographs and memorabilia to them too.
I would love to see the lovely papers YOU will create. Please join us in my Facebook Group and share as you feel comfortable! If you’re not a Facebook user, consider posting in my Oscraps and/or GingerScraps Galleries!

Comments (4)
You must be logged in to post a comment.
Thank you for the tutorial. Your tutorials are always so well written.
Thanks so much, Karen!
Karen – this is a great help! And as always – bless you for the PDF version.
You’re welcome! And I’m glad the PDF is helpful to!